I used to be the person standing on top of my suitcase, jumping up and down, trying to get the zipper closed while my flight boarded in ninety minutes.
It took a genuinely embarrassing number of trips before I figured out that the problem was never the suitcase size. It was how I was putting things into it.
Once I started packing the way I’m about to show you, I went from checking a bag every single trip to fitting a week’s worth of clothes into a carry-on more often than not. This isn’t a minimalist “just bring three shirts” post either. I still overpack a little. I just do it smarter now.
The whole thing clicked for me on a trip where my checked bag got delayed for two days, and I ended up living out of the small backpack I’d carried on.
I noticed I could find everything in that backpack instantly, while my actual suitcase was always a mess of shifted piles by the second day of any trip. That contrast is basically what this entire method is built around.
Why This Method Works
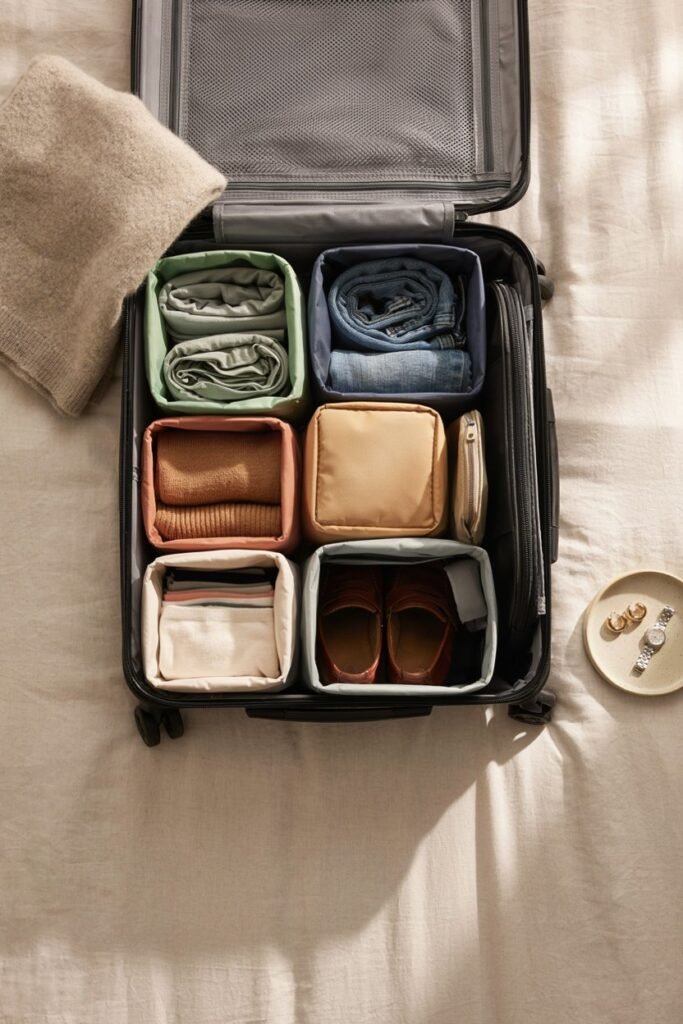
It uses the space you’re already wasting. Most suitcases have dead air in the corners, inside shoes, and around bulky items. This method fills those gaps instead of leaving them empty.
It keeps things visible instead of buried. You stop unpacking your entire bag on a hotel bed just to find one pair of socks, because everything has a designated spot you can see at a glance.
It reduces wrinkling without ironing anything. The folding and rolling combination I use keeps clothes flatter than folding alone, without needing a travel steamer or a hotel iron that smells faintly of burnt cotton.
What Makes the Technique Different
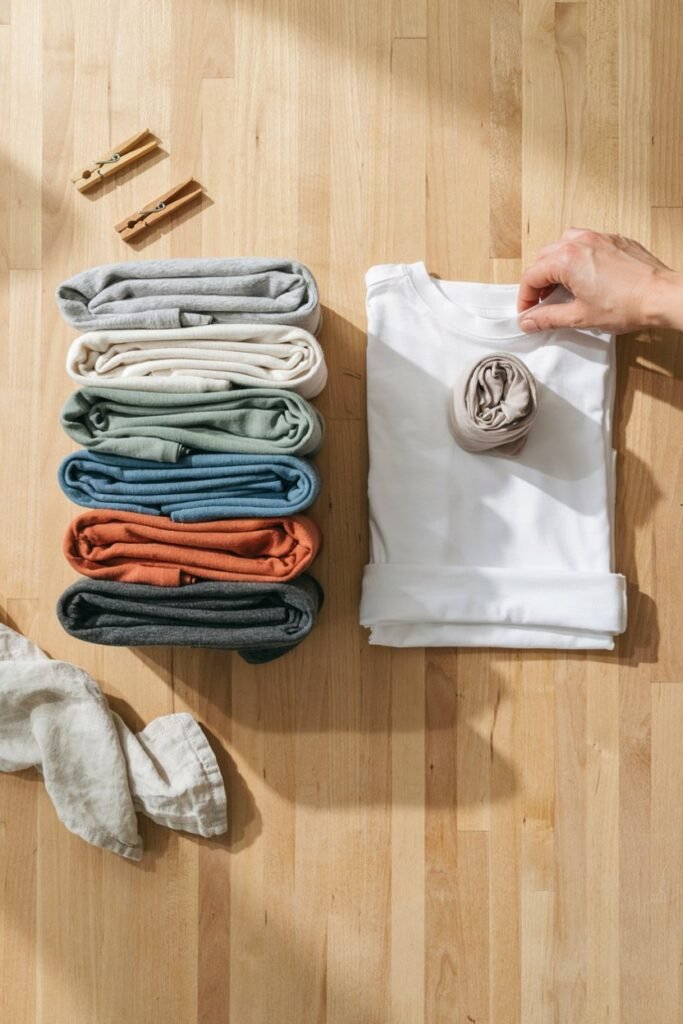
The core of this system is combining two methods that people usually treat as competing choices: rolling and the bundle wrap.
Rolling is great for casual items like t-shirts, underwear, and athletic wear, since it compresses them and lets you see everything at once.
But rolling alone tends to wrinkle structured items like button-downs or blazers, because rolling puts creases in fabric that doesn’t want to bend that way.
The bundle method fixes that. You wrap structured pieces around a soft core, in this case a stack of rolled soft clothes, so the stiffer fabric bends in long, smooth curves instead of sharp folds.
I stumbled onto this by accident after ruining a linen shirt on a work trip, and it’s been my default ever since. The combination gives you the compression benefits of rolling for most of your bag, with the wrinkle protection of bundling for the pieces that actually need it.
Materials
- Packing cubes (2-3 sizes) — these are what actually make the visibility and compression work. Skip these and the rest of the system falls apart a little.
- A soft-sided suitcase or duffel — hard-shell cases work too, but soft sides flex slightly, which helps when you’re pushing the limits of what fits.
- A small mesh or clear pouch for toiletries — clear ones save time at security and let you spot leaks before they hit your clothes.
- Rubber bands or hair ties — for securing rolled items so they don’t unravel mid-transit.
- A laundry or shoe bag — keeps worn items and dirty shoes separated from clean clothes.
Alternatives I’ve Actually Tested
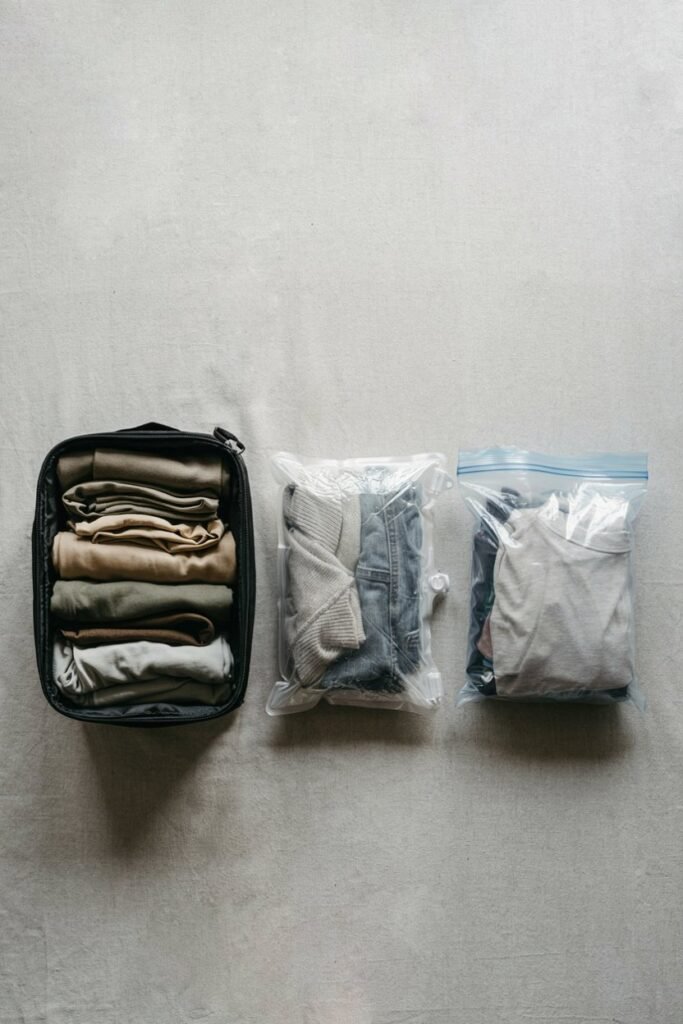
I’ve tried swapping packing cubes for gallon ziplock bags on a budget trip, and it genuinely works almost as well for compression, though you lose the structure and the bags tend to tear after two or three uses.
Vacuum-seal compression bags compress more than cubes do, sometimes by a noticeable margin, but I’ve found they only make sense for bulky items like sweaters or jackets.
Using them for your whole suitcase means you lose the “see everything at a glance” benefit, since compressed bags flatten into opaque blocks.
For toiletries, a plain freezer bag works fine instead of a dedicated pouch, I just prefer the clear zip pouch because it holds its shape better in a side pocket.
Tools You’ll Need
- Packing cubes
- A bathroom scale (for checking bag weight before you leave the house)
- A small luggage tag with your info
- A phone or notebook for your packing list
Step 1: Lay everything out before you pack anything
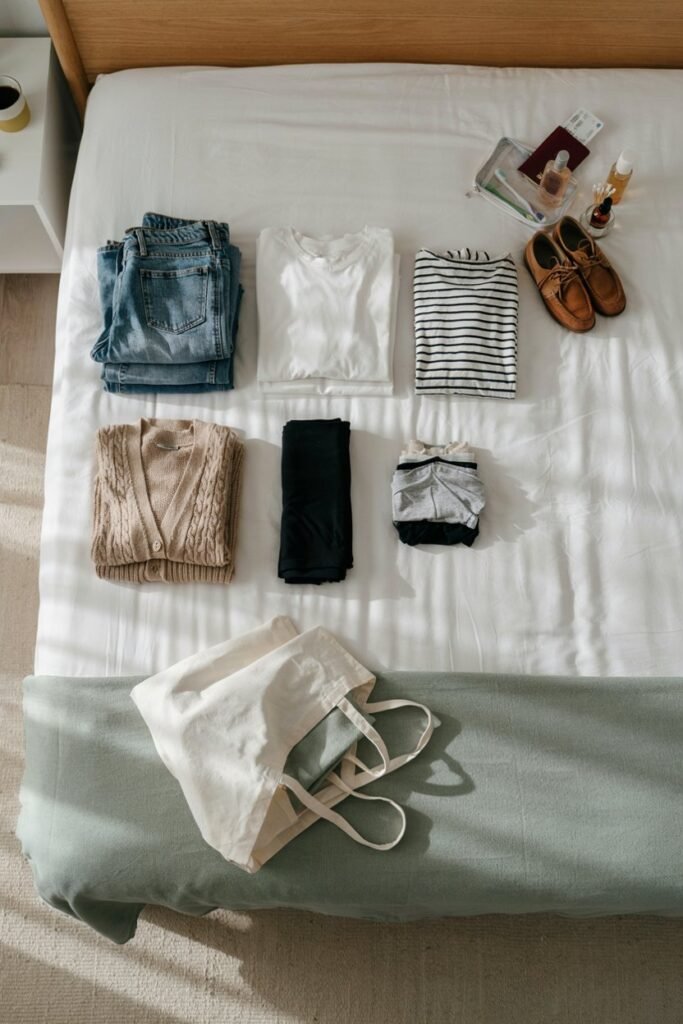
Put every item you think you’re bringing on the bed first. This sounds like an extra step, but it’s the single biggest reason people overpack.
Seeing everything together makes it obvious when you’ve grabbed three nearly identical black shirts.
Step 2: Roll your soft, casual items
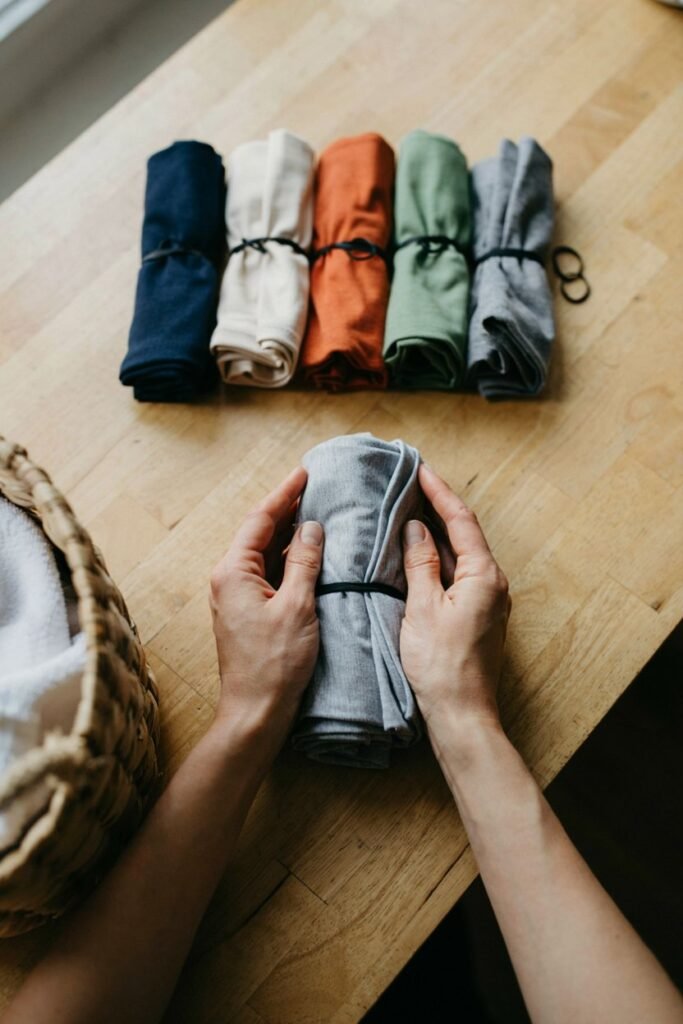
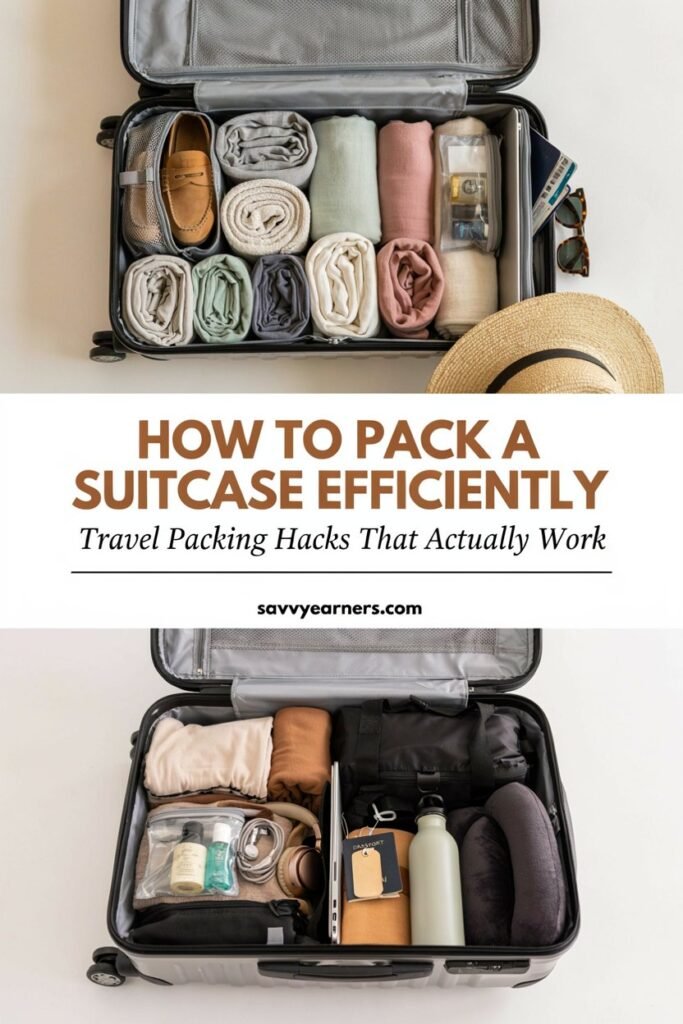
Take t-shirts, leggings, underwear, and socks and roll them tightly from the bottom up. Secure bulkier rolls with a rubber band so they hold their shape when you’re digging around later.
Step 3: Bundle-wrap your structured pieces
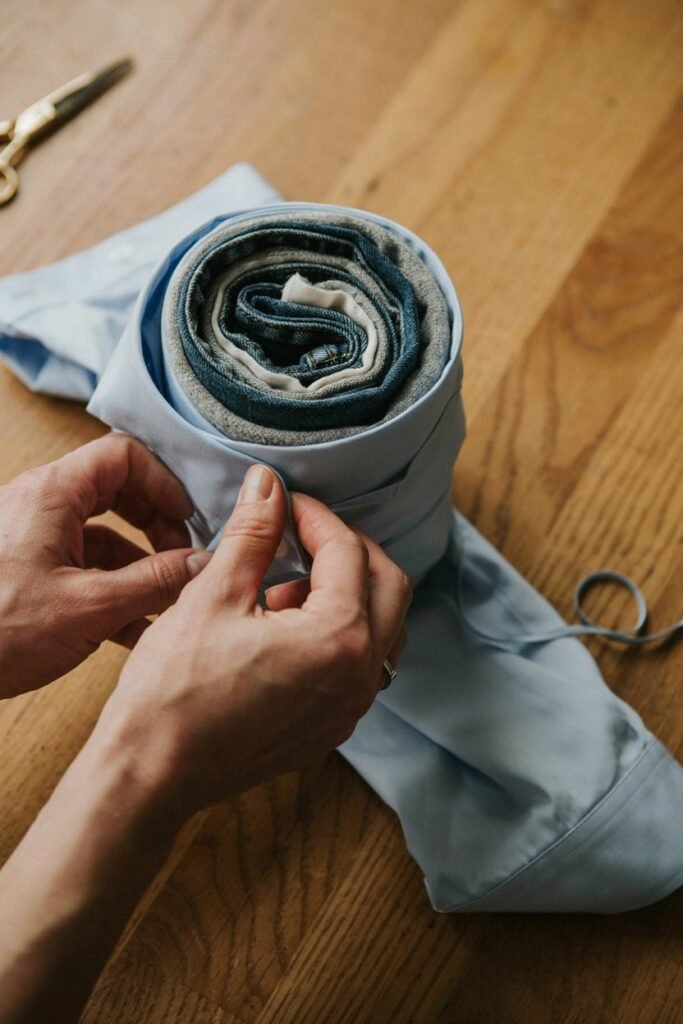
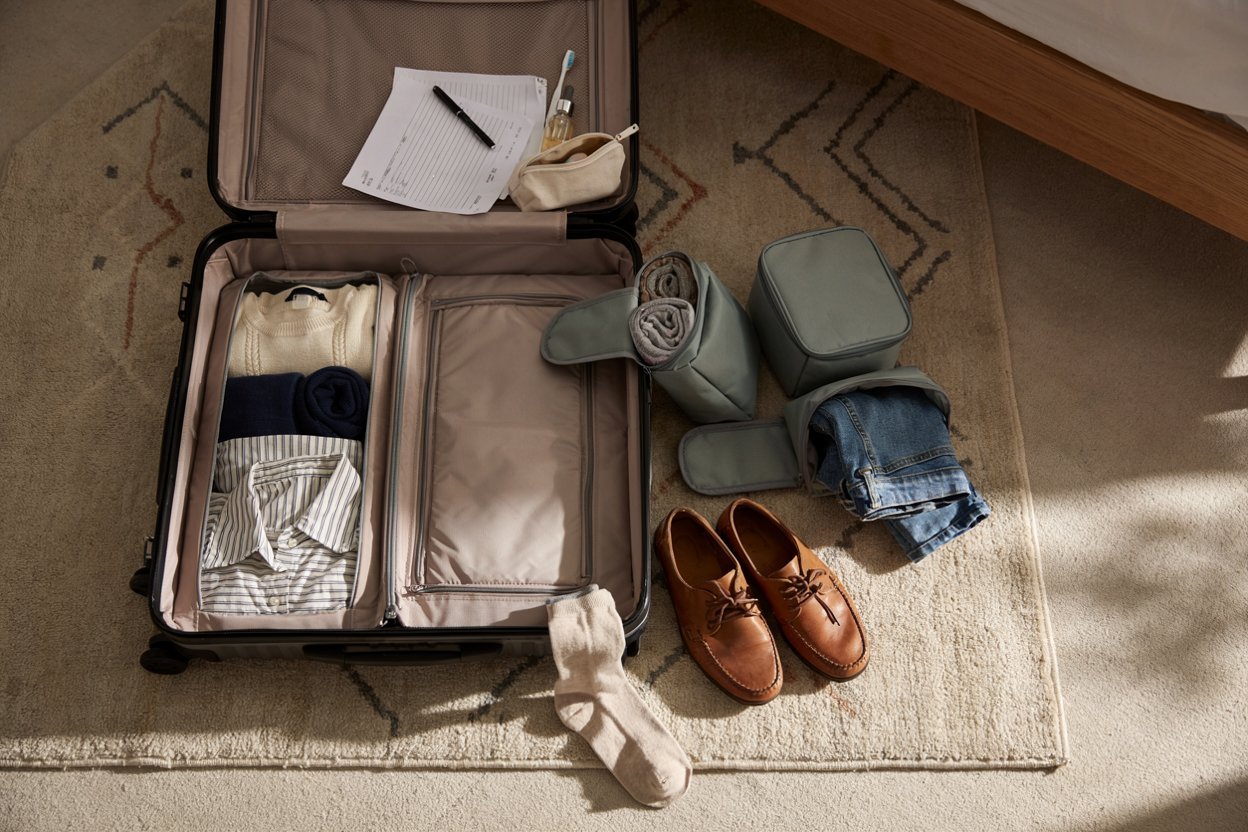
Lay your dress shirts, blazers, or dresses flat, then place your rolled soft items in the center as a core.
Fold the sleeves and edges of the structured piece around that core, working from the outside in, so the fabric wraps in soft curves instead of creasing.
Step 4: Sort into packing cubes by category
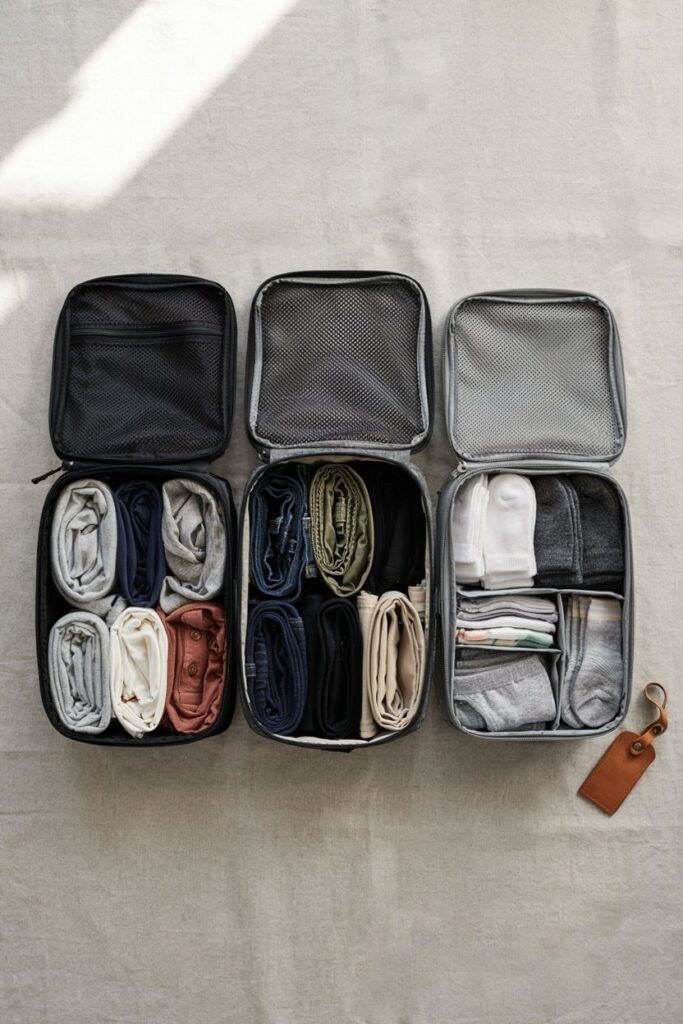
Put rolled casual items in one cube, the bundle wrap in another, and anything delicate in a third. I keep underwear and socks in their own smaller cube so I’m not rifling through shirts to find them.
Step 5: Layer by weight in the suitcase
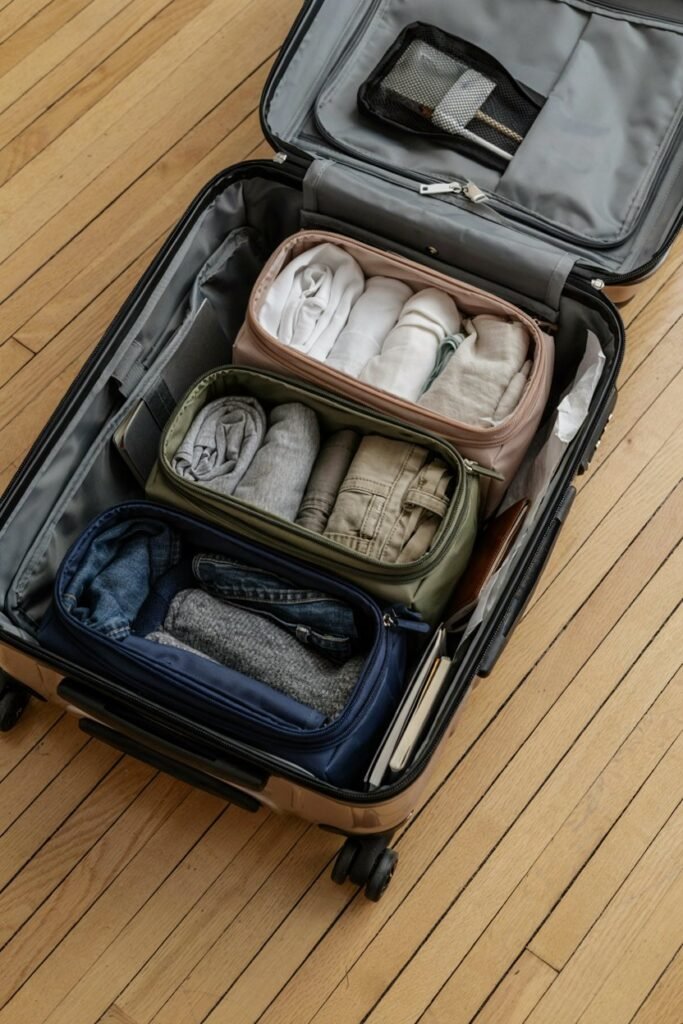
Place the heaviest cube at the bottom near the wheels, mid-weight items in the middle, and your lightest or most delicate cube on top.
This keeps the bag balanced and stops heavier items from crushing anything fragile.
Step 6: Fill the gaps
Tuck socks into shoes, stand shoes upright along the edges of the bag, and slide flat items like belts or phone chargers into any remaining sliver of space. This is the step most people skip, and it’s usually worth another quarter of a suitcase.
Tips From Packing More Suitcases Than I Can Count
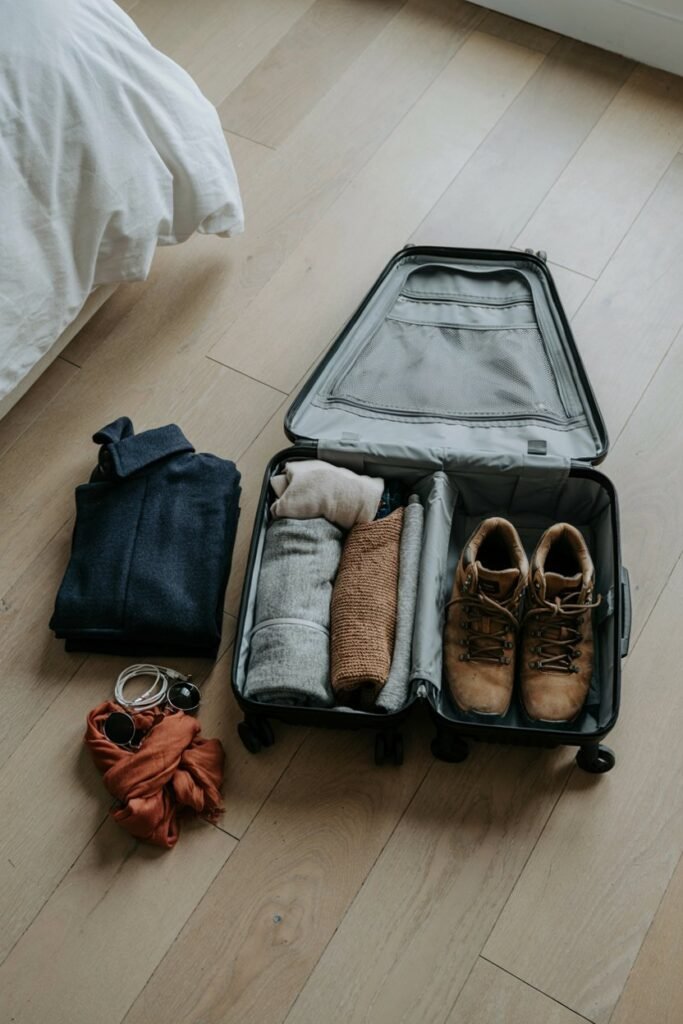
Pack your heaviest shoes first and build around them, not last. Wear your bulkiest jacket on the plane instead of packing it, since coats take up disproportionate space for their weight.
Keep one packing cube completely empty or nearly empty on the way there, it becomes your dirty laundry cube on the way home.
Roll belts into a circle and tuck them inside the collar of a bundled shirt so they hold their shape instead of adding a separate bulky item.
Mistakes I’ve Made So You Don’t Have To
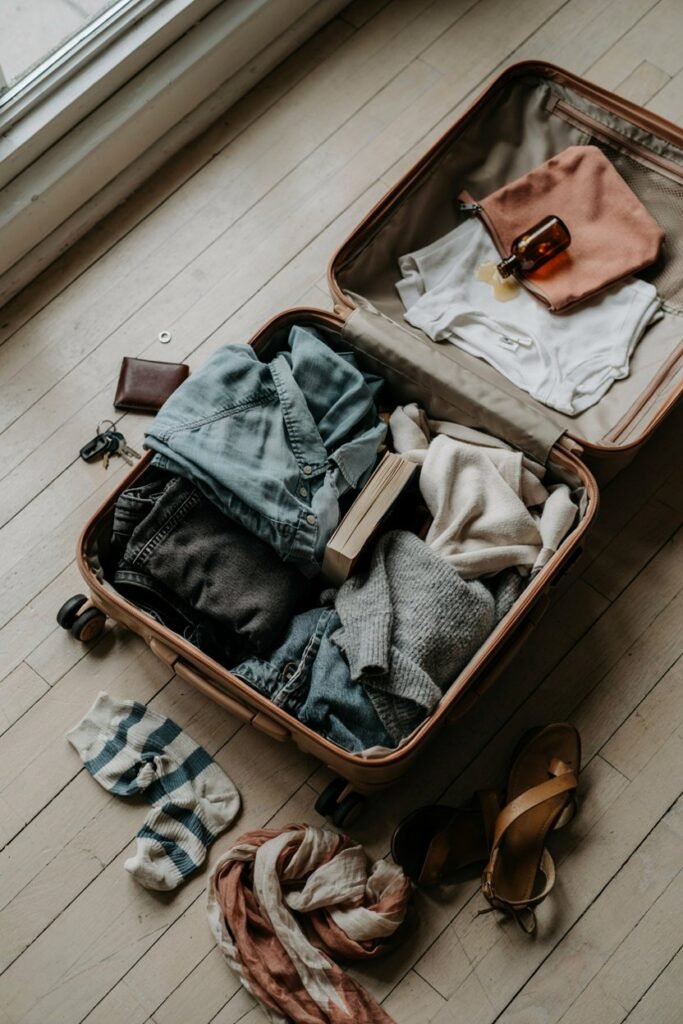
I once packed my liquids in a bag at the very bottom of my suitcase, which meant unpacking half my clothes at TSA while a line formed behind me.
Now they always go in the top cube, closest to the zipper. I’ve also learned not to trust “one size fits all” packing cubes, since a cube that’s slightly too big for what’s in it just becomes wasted space and slides around, undoing a lot of the benefit of using cubes in the first place.
And I used to pack shoes with tissue paper stuffed inside for shape, which is a nice idea in theory and a complete waste of usable interior shoe space in practice. Socks go in there instead now.
Troubleshooting
Suitcase won’t close even though it looks half full. This usually means your cubes aren’t compressed enough. Push the air out of each cube before zipping it, either by hand or by sitting on it gently, rather than relying on the cube’s own zipper to do that work.
Clothes still wrinkled despite bundling. Check what you’re using as the core of the bundle. If it’s too small or too soft, the outer garment doesn’t get enough structure to wrap around and it creases anyway. Use a slightly firmer stack of rolled clothes as the core.
Bag feels unbalanced or tips over when standing. This is almost always a weight distribution issue. Heavy items need to be at the bottom near the wheels, not floating in the middle or piled on top.
Can’t find anything without unpacking half the bag. This points to cubes that are grouped by size instead of category. Regroup by type of item, all tops together, all bottoms together, rather than whatever fit together physically.
Packing Variations
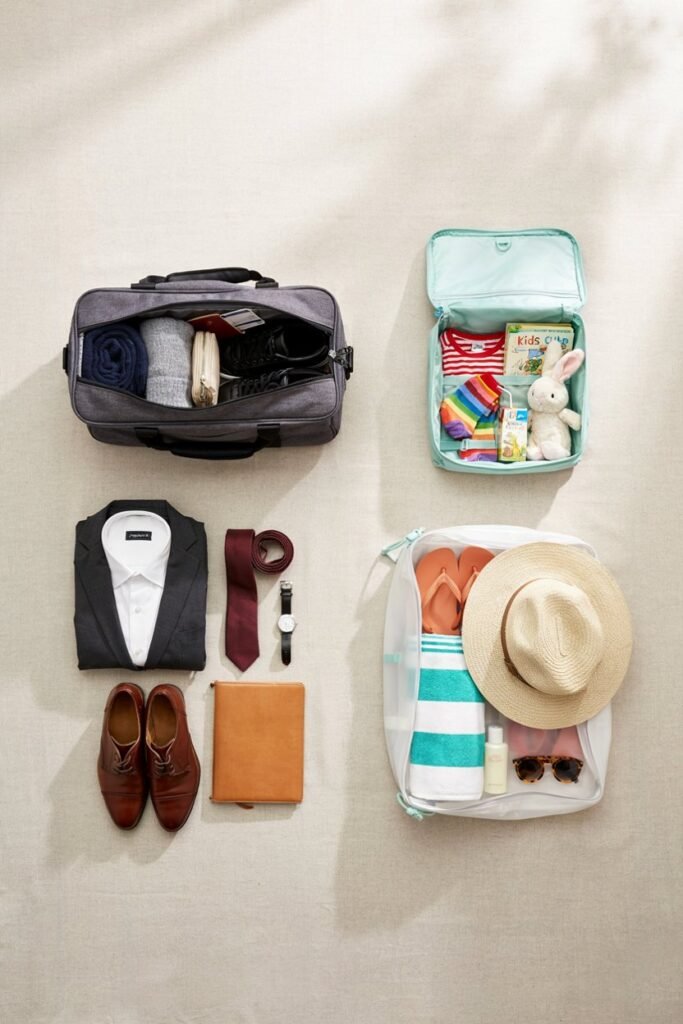
Carry-on only: Drop to two packing cubes max and commit to a three-color wardrobe so everything mixes and matches. Wear your bulkiest shoes and jacket on the plane rather than packing them.
Family or kids’ trip: Give each kid their own single small cube they’re responsible for. It sounds like more cubes overall, but it means you’re not the only person who knows where anything is.
Business trip: Use a dedicated cube just for one or two structured outfits using the bundle method, and keep a separate small pouch for cables, chargers, and a portable battery so you’re not digging through clothes for them in a rush.
Beach or warm-weather trip: Swap one packing cube for a designated “wet items” bag, since swimsuits and cover-ups need somewhere to go on the way home that isn’t touching your dry clothes.
What Else Helps
A luggage scale that clips onto the handle has saved me from a surprise overweight fee more than once, since airport counter scales are the worst place to find out you’re over the limit.
A packable daypack that folds into its own zip pocket is also worth the space it takes up, since it gives you a second bag for the flight home without adding real bulk on the way there.
Storage and Care
Store your packing cubes empty and unzipped between trips so the fabric and zippers don’t take on a permanent compressed shape.
Wipe down the inside of your suitcase with a damp cloth after any trip involving sand, dirt, or spilled liquids, and let it air dry fully before storing it closed, since a sealed damp bag is a fast way to end up with a musty smell you can’t get rid of.
Keep suitcases upright rather than stacked flat under other storage items, which can warp the frame over time.
Prepping Before You Pack
Do a quick inventory of your packing cubes and toiletry pouch a day or two before you start packing, not the night before.
This is when you notice a broken zipper or an empty travel bottle with enough time to actually fix it.
I also keep a running packing list on my phone that I copy and adjust for each trip type, rather than starting from scratch every time, which cuts my actual packing time down to well under an hour.
Frequently Asked Questions
Do packing cubes actually make a difference, or is it just marketing? They make a real difference, mainly through compression and organization rather than magic. The compression alone typically gets you back ten to twenty percent more usable space compared to loose folding.
How many packing cubes do I actually need? Three is the sweet spot for most trips: one for tops, one for bottoms, one for underwear and socks. Add a fourth for shoes or wet items on longer or warm-weather trips.
Is rolling or folding better for avoiding wrinkles? Rolling wins for casual, soft fabrics. Structured fabrics like dress shirts or blazers do better with the bundle wrap method described above, since straight folds and tight rolls both tend to crease them.
Should I pack shoes in their own bag? Yes, mainly to protect your clothes from the bottom of your shoes, not because shoes themselves need special protection. A basic drawstring bag or even a repurposed grocery bag works fine.
What’s the best way to keep liquids from leaking in my suitcase? Keep travel bottles filled no more than three-quarters full, since pressure changes in the cargo hold can cause expansion, and always store them upright inside a sealed pouch, not loose in a cube.
How do I keep a carry-on under the weight or size limit? Weigh your bag at home before you leave, not at the airport. If you’re close to the limit, wear your heaviest shoes and jacket on the plane instead of packing them, since that instantly frees up meaningful weight and space.
Is it worth buying expensive packing cubes, or do cheap ones work fine? For most travelers, mid-range cubes hold up just as well as premium ones. Where you notice the difference is in zipper durability over repeated trips, so if you travel frequently, it’s worth spending a little more on that detail specifically.
Final Thoughts
None of this requires new luggage or expensive gear, just a system that actually uses the space you already have.
Once bundling and rolling become second nature, packing stops being the stressful part of a trip and turns into something you can do on autopilot in under an hour.